

HOME BARISTA TIPS - Steaming Milk
Posted by Andy on 16th Dec 2024
ACHIEVING SILKY MILK AT HOME
There's nothing quite like watching someone pour glossy, creamy
milk into a cup of espresso. The milk just seems to glide across the surface of
the cup leaving a shiny, glistening finish on the coffee. Baristas make it look so
effortless… But when many of us steam milk on our home espresso we’re left with
a big foamy mess or worse, no foam at all.
Like many coffee-making techniques, achieving silky milk is very doable. It
just takes a bit of know-how and a bit more practice. Let’s dive in!
You will need:
An espresso machine - 400ml or 600ml jug - fresh cold milk (our favourite milk is from Hobart Milk Factory) - a cleaning cloth.
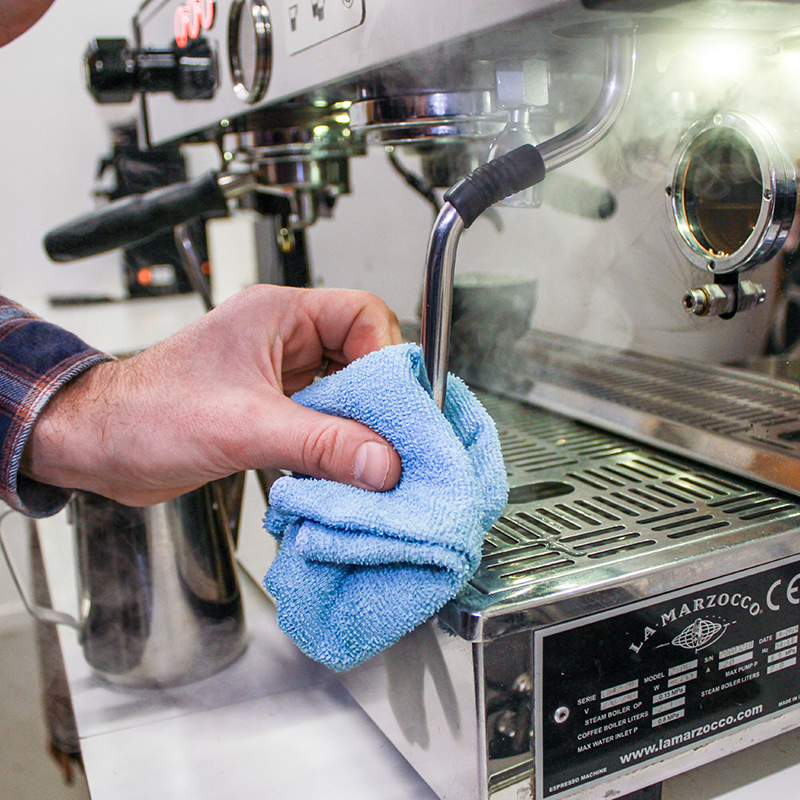
STEP 1 – Purge the Steam wand
Excess condensation can build up in the steam wand and needs to be removed before we start. Place a cloth over the end of the steam wand and turn it on for a few seconds.
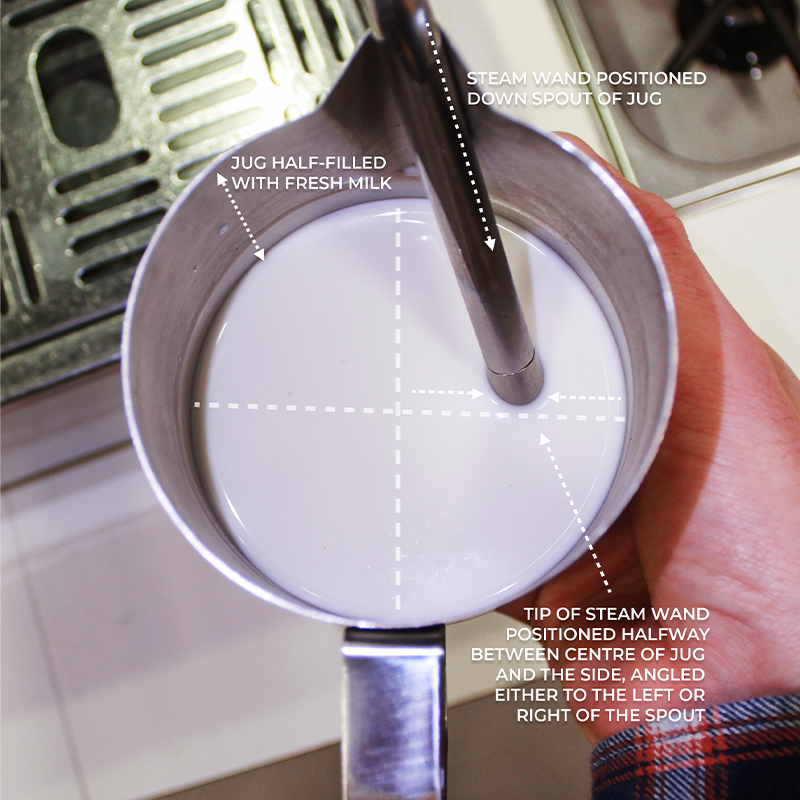
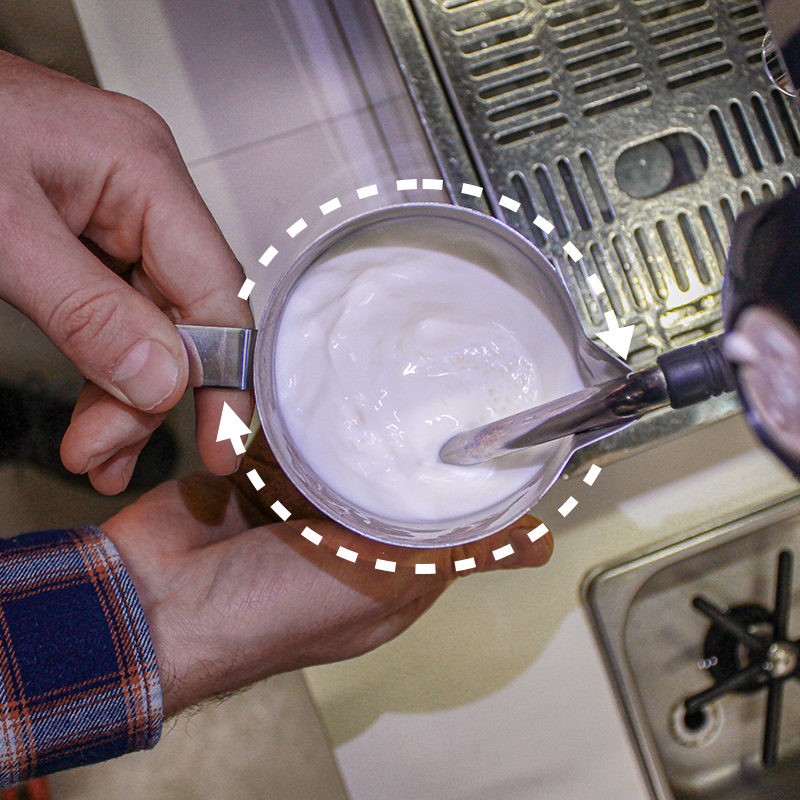
STEP 2 – Position Steam wand in the jug.
Your jug should be filled to just under halfway with fresh cold milk. Sit the
steam wand directly down the spout of the jug into the middle of the milk, with
the tip just below the surface, about 0.5cm deep. Shift the steam wand halfway
between the middle and the side of the jug (left or right, whatever feels good).
This position will create a whirlpool motion when the steam is engaged.
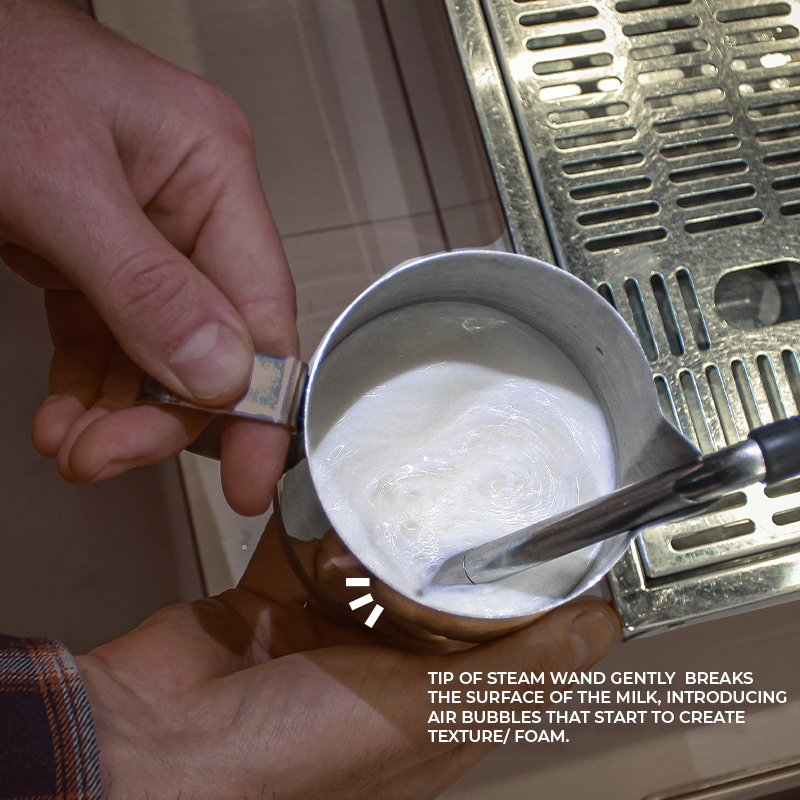
STEP 3 – Steam ON! Aerate!
What we’re aiming for from the get-go is to introduce air in straight away
into the milk to create foam. The closer the tip of the steam wand is to
surface of the milk, the more foam the milk will have. Turn your steam wand on
all the way. For a classic flat white, let it aerate for a few seconds. For a
cappuccino/ more foam, add a couple more seconds of aeration.
STEP 4 – Lift jug, maintain whirlpool
Once you’re happy with the amount of foam added into the milk, it’s time to
submerge the tip of the steam wand into the milk to stop additional air entering in, and heat the
rest of the milk up to temperature. The whirlpool will continue and cause all
the bigger bubbles we’ve made to be sucked into its vortex and create
micro-foam.
STEP 5 – Getting Hot (but not too hot).
Once the jug becomes too hot to touch it will be around 60C, and it’s time to turn the steam wand off. For cooler coffees, turn the wand off a couple seconds earlier, for hotter coffees remove your hand and count to 3 before turning the steam off.
Note: At 70C, Milk proteins will start denaturing, removing natural sweetness
from the milk and giving a sour burnt taste, so you don’t want to leave it on
for too long!
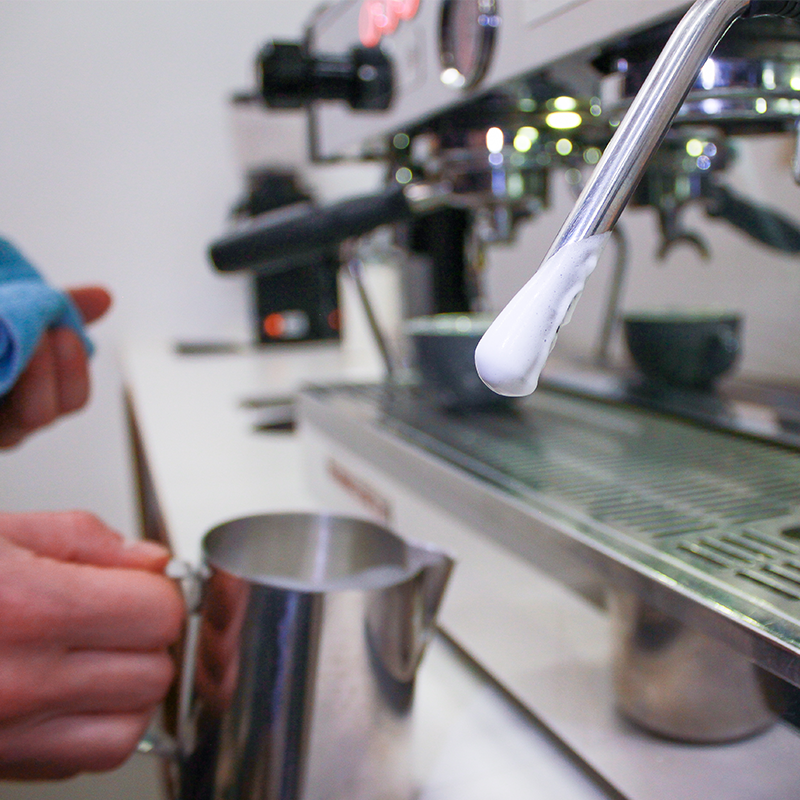
STEP 6 – Clean up.
Wipe all residual milk off of the steam wand and purge. If left uncleaned, milk can sit inside and dry in the tip of the steam wand, and it’s easiest to remove before it’s had a chance to dry.

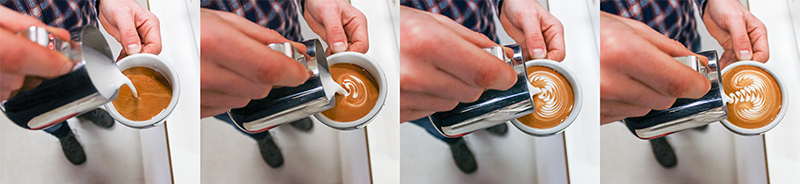
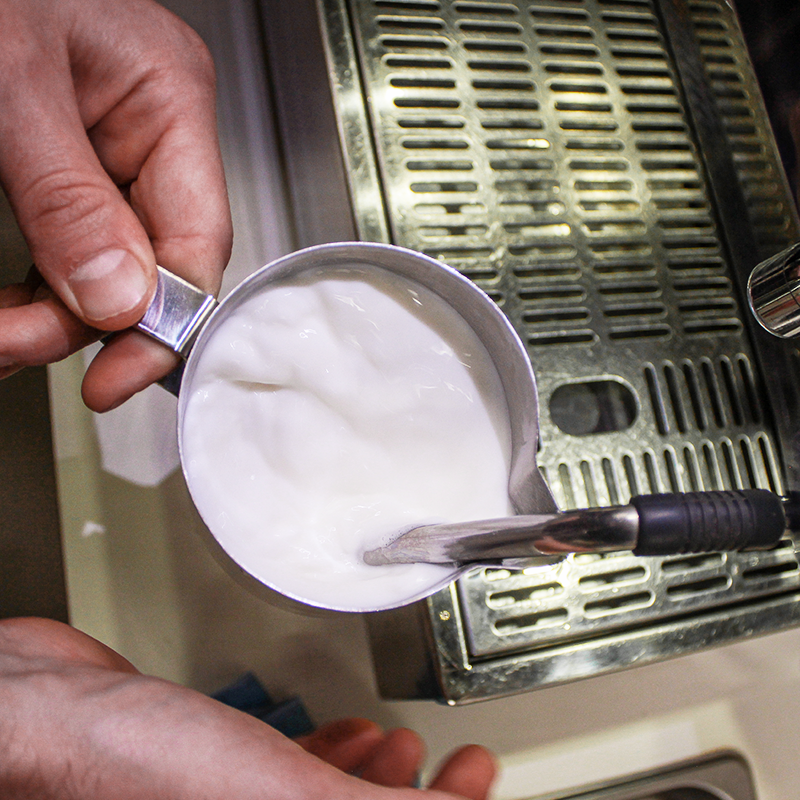
FINISHED
You’ve done it! You now have silky steamed milk. Look how creamy and delicious
it looks!
For best pouring results you’ll want to pour into your espresso straight away.
Steamed milk will separate into stiff foam and wet milk if it sits around too
long. Keep the milk moving around in the jug to keep it in this homogonous
creamy state.
Happy Steaming Team.
Andy
Looking for the perfect coffee to have with your silky milk? We recommend
checking out our Espresso Blends for the perfect
flat white! If you are in need of a milk jug for home, we’ve also got several
sizes of jugs from the Incasa range available.